Blog Layout

What is the process to install a fiberglass pool?

Fiberglass Pool Installation Timeline

Fiberglass Pool Installation Process
In-ground swimming pools will have a positive impact on your life and your family’s life. From parties to swimming laps, to cookouts, to relaxing nights, your pool will deliver an array of benefits. Unfortunately, there will be time, effort, and expense involved in completing the project, but the payoff will be worth it!

The process of building a fiberglass pool can be a fun and exciting event if you are prepared in advance for what all is going to take place. There are many steps that go into building a beautiful, professionally installed pool. Here, we’re going to give you an idea of how long each step takes, so you have a better sense of when your pool will be complete. Please keep in mind that backyard conditions, weather, or the number of workers can have an impact on the timing for the various steps to a finished pool project.

What To Expect When Installing A Fiberglass Pool

The excitement is mounting! You’ve just signed on the dotted line and are ready to break ground to begin the installation process for your brand new fiberglass pool. While you can expect many years of splashing and frolicking in your own backyard oasis in the very near future, there is going to be a period of “growing pains” in order to get your new pool properly installed.


We’re not going to sugar coat it: the fiberglass pool construction process will require heavy equipment, and your backyard will look like a construction site for a few weeks. But – deep breaths – this is only temporary! To prepare you for the road ahead, we’ll walk you through the steps involved to help give you a more accurate picture of what you can expect in terms of installation time. Trust us, a properly installed fiberglass pool is worth the wait and will give you years of enjoyment!


Step 1: Backyard Prep and Digging

All site prep starts with obtaining the proper permits, and identifying where utilities are located within the project area. Utilities can be buried or overhead. They might interfere with the project and will have to be marked for re-locating prior to any site work. Once you have permits and utilities out of the way, the site is prepared by first establishing the finish grade of the pool wall. Well before your application for a building permit, the excavation area is then prepared by outlining the pool dimensions with spray paint or using a pre-fabricated template that matches the pool design. This shouldn’t take more than a couple of hours at most, depending on the equipment. Once the elevation is set and the layout is marked, excavation can begin.
Fiberglass Pool Installation Process

Step 2: Excavating and Setting

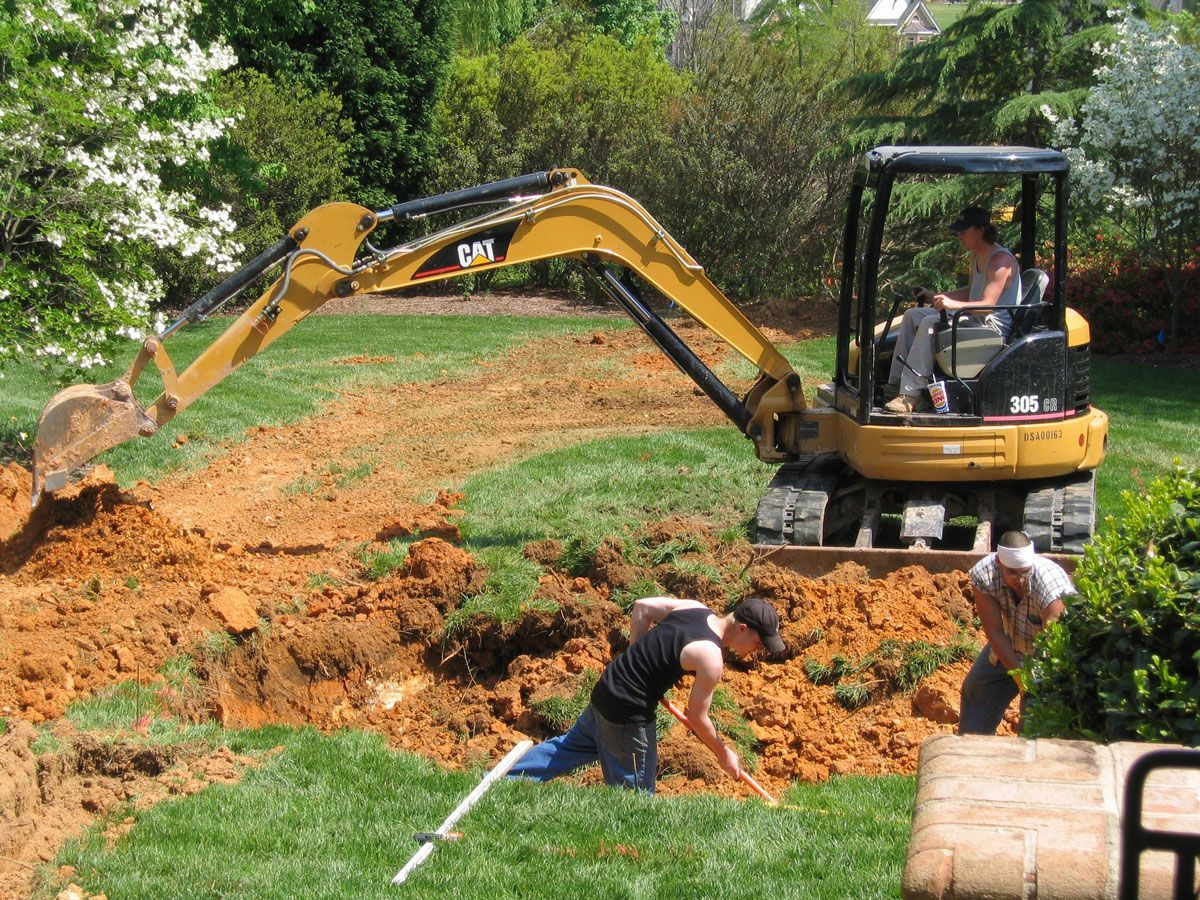
Before fiberglass pool construction begins, the first step is to hollow out a space in your backyard or side yard where the pool will be located. How much room you need for your pool excavation will be dependent on the design template, size, and shape of the fiberglass pool shell you choose.


Most of the digging will be done by an excavator, which will remove the vast majority of the dirt. Care is taken to follow the outline of the pool by only slightly digging beyond the dimensions of the pool by 8” to 12” for a “tight” fit. Once the digging is finished, it’s time to place the base material for your pool’s foundation into the hole that’s been excavated. You may be wondering, “What do you even put under a fiberglass pool?”


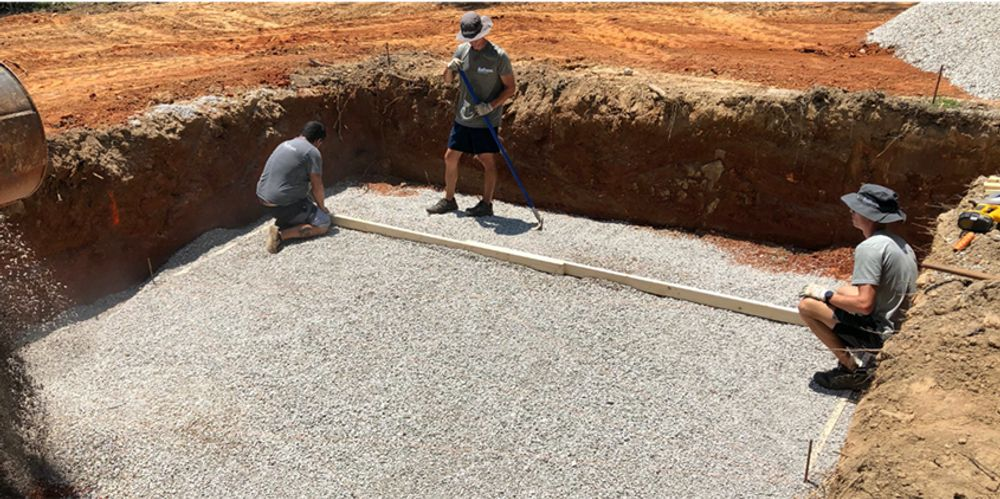
The foundation for an inground fiberglass pool generally consists of a two-inch base of gravel. The purpose of the foundation is to give your pool a firm, even, and stable surface to rest upon, minimizing the risk of settling, bulging, or leaking that could damage the pool and surrounding soil. The bottom of the excavated area is dug 4” deeper than necessary, to allow for sand or ½” gravel fill material to be added and a smooth area prepared for the pool bottom to rest.


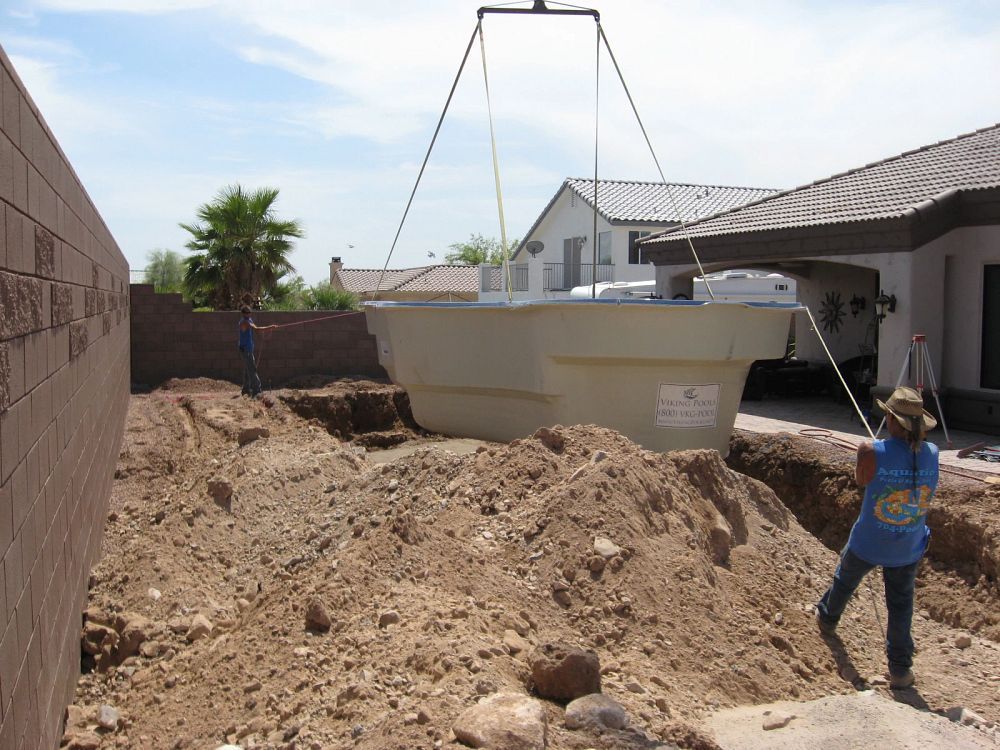
The pool is then set by crane or other equipment using lifting straps to meet APSP/ANSI codes for level application. This may take the builder several attempts to prepare the bottom of the hole and lift and set the pool level. This is a normal procedure. Additionally, a sump line or a daylight drain is installed at the deep end of the pool to assist with balancing hydrostatic pressure, which is the pressure the water in a pool exerts on the walls and floor of the pool from the inside. From the start of the excavation, you can expect up to 3 days until your fiberglass pool is nestled into the excavation site. Some builders can do this process in 1 day while others, with different equipment, may take longer.
Fiberglass Pool Installation Process

Step 3: Adding Water and Backfill

Once the pool is set level, the process of adding water and backfill begins. Backfilling is the process of filling the gap between the fiberglass pool shell and the excavated hole (also known as “locking in” the pool). This is also the stage when water is added to the pool, along with a drain pipe that helps to circulate water properly.


First, 6” of sand or 6” of ½” gravel is placed around the bottom radius of the pool. The pool is then filled with 6” of water. To ensure that pressure on the outer and inner walls of the pool remains equal throughout backfilling, your builder will alternate between locking in the pool with six inches of gravel, then filling the pool with six inches of water. Working with care and precision, your builder will continue to alternate between these procedures until backfilling and pool filling is complete.


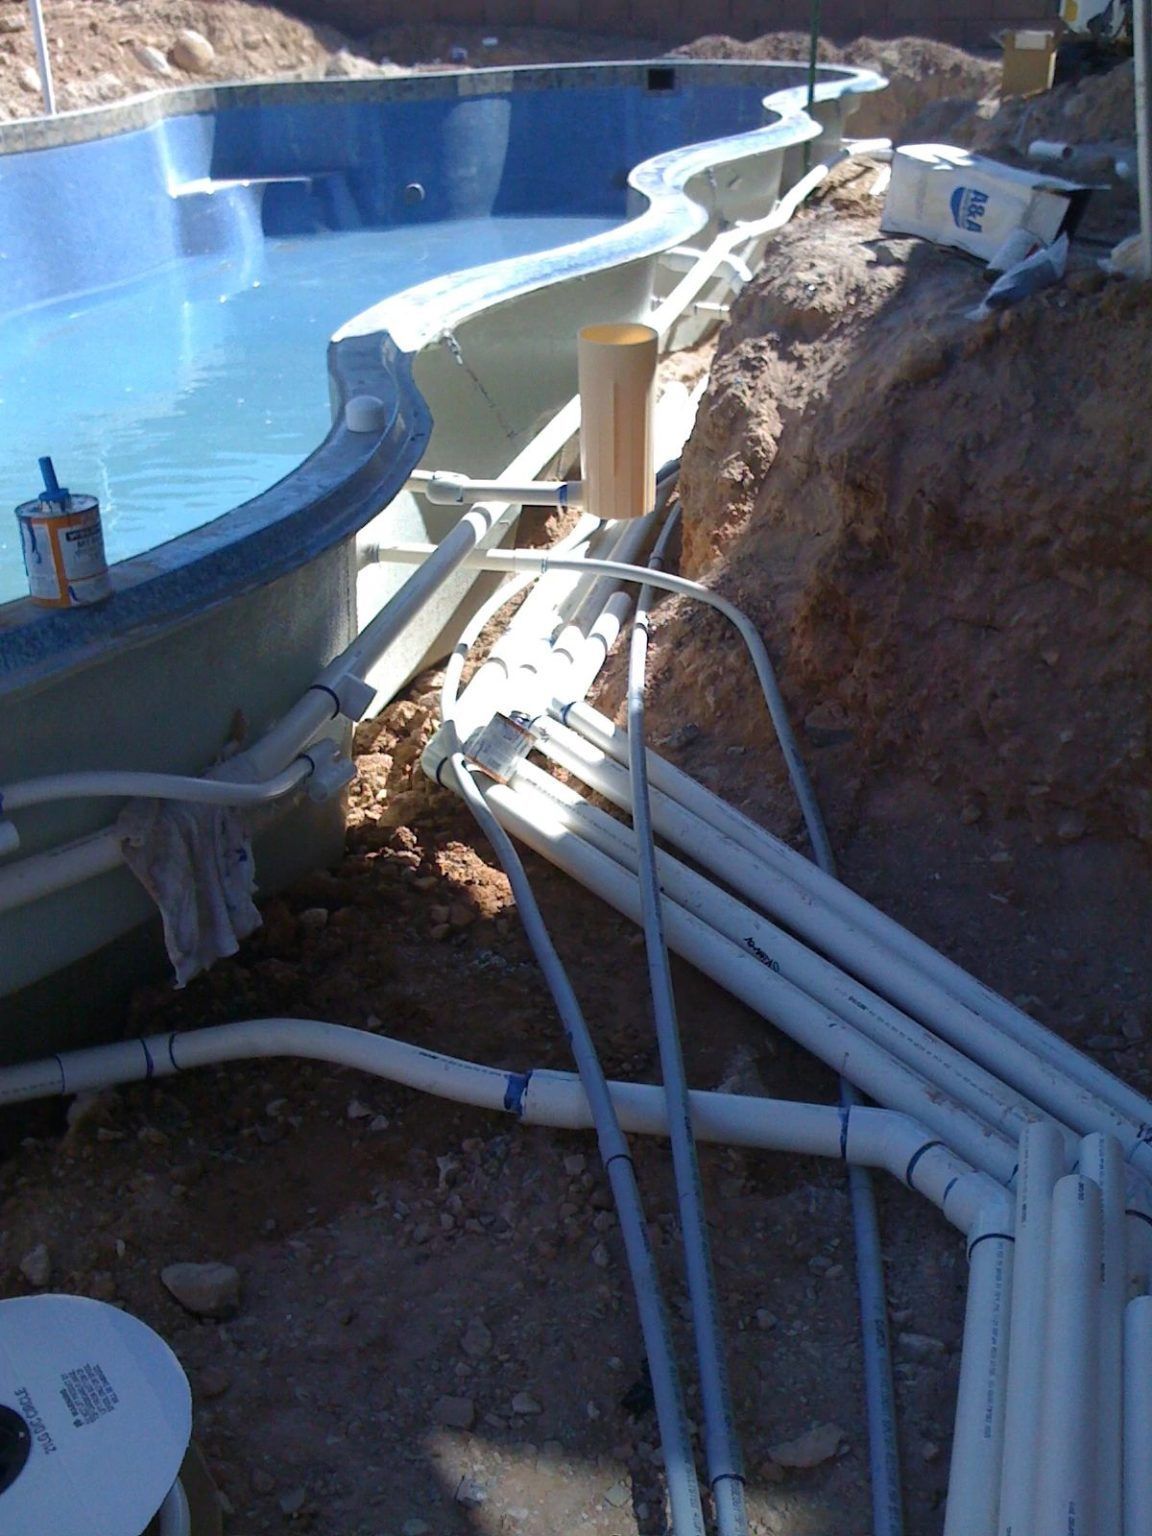
When the backfill and the water reach areas for plumbing fittings, the builder will attach PVC pipe to the fittings and pressure test the lines for leaks. This is also the time that the lights will be installed and other possible water features. If all is working, then the process of adding water and backfill continues until they are at the grade level for the deck placement. This entire process can take 1 to 4 days, depending on the builder.


Step 4: Plumbing and Electrical Installation

To stay fresh and clean, your fiberglass pool needs a plumbing system. This system features two main parts: a pool filter that removes small pieces of debris, and a pool pump that circulates water through the filtration system. Keep in mind that, even with filters, you will still need to periodically skim your pool with a net in order to remove larger debris items.


An equipment pad will be strategically located on the project site to hold the pump, filter, heater, electrical connections, and other options that may be part of the installation. As the plumbing lines and electrical lines have already been run in the previous steps, hooking up the pump, filter, heater, water features, and electrical lighting is a simple process. Depending on personnel and local inspection requirements, this part of the process averages 1 to 3 days. 

Fiberglass Pool Installation Process

Step 4: Plumbing and Electrical Installation

To stay fresh and clean, your fiberglass pool needs a plumbing system. This system features two main parts: a pool filter that removes small pieces of debris, and a pool pump that circulates water through the filtration system. Keep in mind that, even with filters, you will still need to periodically skim your pool with a net in order to remove larger debris items.


An equipment pad will be strategically located on the project site to hold the pump, filter, heater, electrical connections, and other options that may be part of the installation. As the plumbing lines and electrical lines have already been run in the previous steps, hooking up the pump, filter, heater, water features, and electrical lighting is a simple process. Depending on personnel and local inspection requirements, this part of the process averages 1 to 3 days. 


Step 5: Pouring Concrete and Finishing the Pool

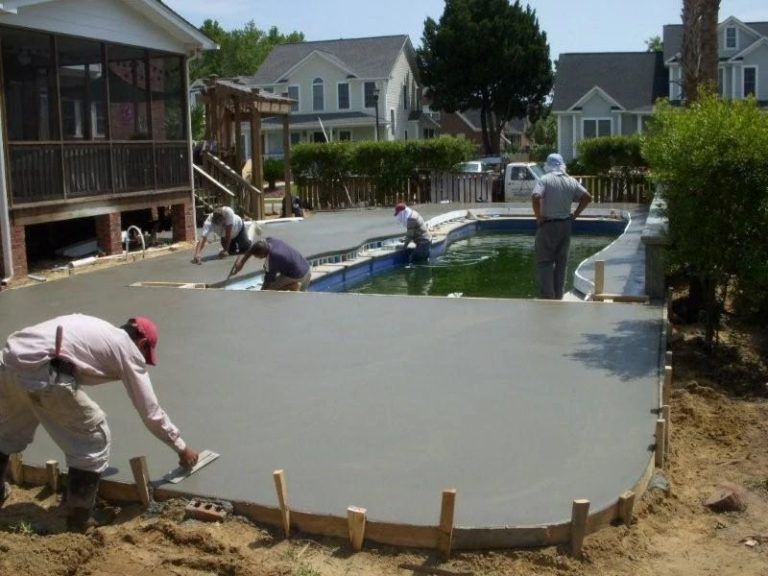
Once the conditions are right to start pouring concrete, the deck of your pool area will begin taking shape. Setting up the forms, pouring the concrete, and letting it settle can take anywhere from 2-3 days, depending on the weather. While the concrete is curing, the construction team will clean up the site and make sure that your in-ground fiberglass pool and all equipment is operating properly.


Step 6: Coping & Decking

“Coping” is the trim that borders the edge or lip of the pool, as the margins around the page of a book. Pool coping is both decorative and practical, giving your pool added visual flair while blocking water from spilling over the pool shell and leaking into the soil. It generally takes somewhere from around two to five days to finish building a pool deck and installing the coping.
Fiberglass Pool Installation Process

Step 7: Fencing

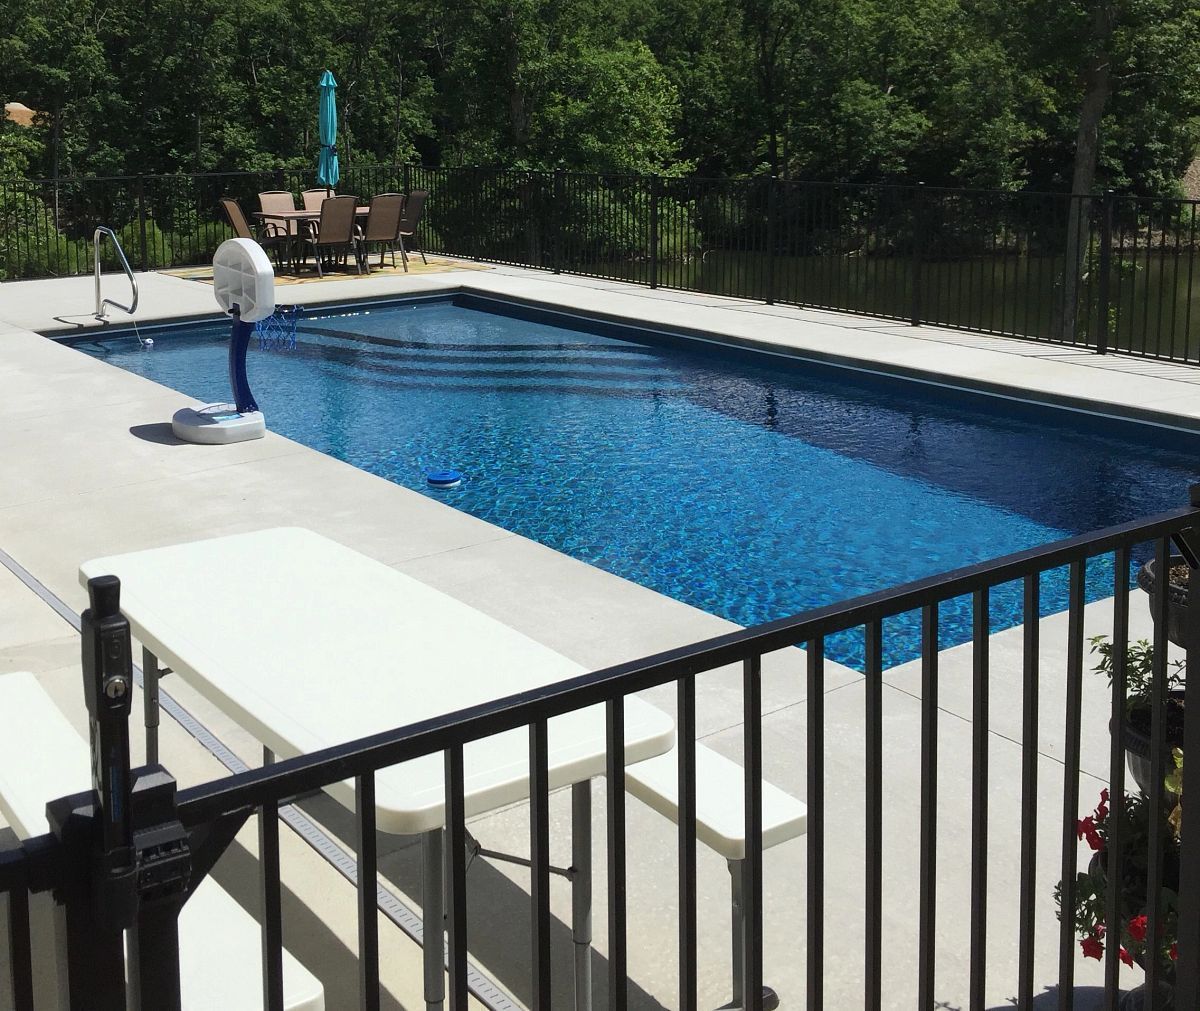
The last step of fiberglass pool installation is to erect safety fencing around your swimming pool. Not only does fencing give you privacy, but even more importantly, it also protects children (or pets) from wandering into your pool and becoming injured. Fencing must meet specific height and design requirements to comply with safety regulations, such as featuring latches located at least 54 inches above ground level.
Fiberglass Pool Installation Process

Fiberglass Pool Installation FAQ

Adding a new fiberglass pool to your backyard can be an exciting event. However, you probably have a few questions about the process. Not to worry! Here are answers to some of the most common questions we hear about fiberglass pool installations.


How Long Do Fiberglass Inground Pools Last?

Fiberglass pools can last for a lifetime if properly maintained. Some fiberglass pools that were installed nearly 50 to 60 years ago are still being enjoyed well into the 21st century! However, it’s important to note that while these durable inground pools can last for decades, their longevity depends on a variety of factors, including regular upkeep, climate, and proper installation.


Can I Install My Own Fiberglass Pool?

The longevity of your fiberglass pool starts with making sure it’s properly installed in the first place. Taking the DIY route towards installing a fiberglass inground pool is not advised. Because it is such a complicated and nuanced process with a variety of logistics and a need for skilled labor – from construction to plumbing to electrical wiring, attempting to install a fiberglass pool on your own can be far more costly than enlisting the aid of professionals.


For starters, it can be challenging to obtain all of the proper permits prior to breaking ground, not to mention the need for heavy equipment involved in digging a hole for your pool and pouring concrete. Experienced professionals will be able to confirm if there are any utilities (such as electrical wires or water and sewage lines) that may be directly above your pool or buried beneath the ground where you plan to install your pool.


Similarly, if your backyard is not level or there are rocks, pipes, or other unforeseen obstacles, it can be risky to attempt a DIY install. A trained fiberglass pool professional will be able to assess the situation and offer up solutions. Improper leveling of the ground prior to installation can impact your pool over time, causing problems that will impact the overall health of your pool. Working with a professional to install your new fiberglass pool is crucial to being able to enjoy it for decades to come.


Fiberglass Pool Installation Guide

You may be wondering now, “How will they get my fiberglass pool in my backyard?” An in-ground pool installation is considered “major construction.” Consequently, if you come away from a conversation with an installer believing that you’ll “hardly know they’re there,” they probably haven’t set your expectations properly.


The truth is, large machinery is required to excavate the spot for your new pool, get it into place, and backfill around it. So, there will be noise, disruption of your landscaping, etc. In the interest of full transparency, here are some aspects of in-ground fiberglass pool installation that you should be aware of:


Heavy equipment access

Excavators, dump trucks, concrete trucks, cranes and other machinery will need access to your yard. This may require the temporary removal of fencing, small trees and shrubs, etc. And, this equipment is heavy, so it will create ruts in your lawn. If access is inhibited, extra costs may apply.


Driveway/sidewalk damage

While your installation team will take great care in navigating in and out of your yard, if they have to take machinery across a driveway or sidewalk, there is the potential for damage.


Bad Weather or Unforeseen Ground Conditions

Poor weather conditions and unforeseen ground conditions, like hitting rock or water issues, can occur anytime during the construction process, creating setbacks. No one can predict the weather accurately or see underground obstacles, so prepare yourself for the possibility that setbacks may occur beyond you or the builder’s control.


Unstable soils requiring a lift

If the soil in the area where your pool will be installed is deemed unstable, it may be required to build it up to create the necessary “lift” to support your pool. This is done by adding layers of compacted stone. While it is very effective, this process is also time-consuming and expensive.


Bedrock or shale that must be removed

Digging out soil to place a pool goes fairly quickly. If bedrock or shale is encountered, however, a hydraulic hammer must be brought in to break up the layer so it can be hauled away.


How Long Does it Take to Install a Fiberglass Pool?

The timeline for building a fiberglass pool could be as little as three days after delivery, however, timing may fluctuate depending on factors like weather, the size of your pool, and types of equipment needed to complete the project. Additionally, your timeline can experience a setback if there are unforeseen complications – such as any utility lines running beneath your property or unstable soil. Your builder will be able to help firm up expectations around timing after assessing your backyard and offer up a more accurate timeline. By comparison, an inground gunite pool generally requires around six to eight weeks for construction, while the pool installation time for a vinyl liner pool is typically two to four weeks.


Ready to Plan Your Dream Fiberglass Pool?

To make a dream come true, you have to have a plan. If you’re ready to plan the pool of your dreams, contact us:

Contact Us

Learning Center
17 Mar, 2024
Full service turnkey projects or simple dig, set, plumb. We have a package for you!
Complete backyard with new fiberglass pool
16 Mar, 2024
The reasons why fiberglass is a great choice for north central Florida families
Swimming Pool Options and Accessories
04 Mar, 2024
Swimming pools are not just a place to cool off; they can also be a focal point for relaxation, exercise, and socializing. When it comes to choosing the right swimming pool options and accessories, there's a wide array of choices to consider. Here's a comprehensive guide to the top options and accessories for your swimming pool.
26 Feb, 2024
You asked us so we thought we would let you know what to do if you buy a home with a pool. When you live in Florida, having access to your own swimming pool — for most people — seems to make sense. It’s the only way to make it through the triple digit temperatures and it’s a great place to have a staycation and to entertain friends and family. A swimming pool and your Florida home go hand-in-hand. If you’re buying a home in Florida and it comes with a swimming pool, you may have some questions that you need answered. Florida Leisure Pool and Spa understands having a pool brings with it unique advantages and some disadvantages if you’re not prepared. What to know if you buy a home with a pool Advantages of buying a home with a swimming pool It’s already there. You may find it less expensive to buy a home with a pool than to build a pool You won’t have to live through a construction project Your home will the the hot spot for friends and family It’s a great place to relax and unwind You can get, and stay, in shape no matter how hot it gets. You can start swimming immediately if in good working condition Here are some disadvantages to buying a home with a pool: It’s used It may not be the size, shape and style you had always dreamed of There could be issues lurking beneath the surface of the pool — potential problems with the plumbing or equipment or the structure itself. You will definitely want to consult with a reputable swimming pool contractor such as Florida Leisure Pool and Spa to get the pool inspected before you make any decisions on the property. Depending on the age it might cost you more to maintain than a new pool would You could be faced with higher than necessary utility bills and higher costs for cleaning and maintenance simply because of its age and the condition of pool pumps and filters You might simply just not want a pool. If you love the house but don’t love the pool, what do you do? Fill in the pool? Walk away from the deal? It’s something to think about. Contact us to schedule a swimming pool inspection prior to making any commitments on buying a home with a pool.
26 Feb, 2024
In Florida, where the climate tends to be warm year-round with mild winters, the considerations for building a pool differ slightly from regions with more pronounced seasonal changes. Here's a tailored guide for building a pool in Florida 1. Year-Round Construction: Due to Florida's consistent warm weather, pool construction can occur throughout the year. Unlike in colder climates where winter weather can halt construction, Florida offers the advantage of a more extended construction season. 2. Avoiding Hurricane Season: While construction can occur year-round, it's essential to consider Florida's hurricane season, which typically runs from June through November. During this period, there's an increased risk of severe weather, including heavy rainfall and strong winds, which could delay construction and affect the quality of work. Therefore, many homeowners prefer to schedule pool construction outside of hurricane season to minimize potential disruptions. 3. Off-Peak Construction: Similar to other regions, pool construction in Florida may experience peak demand during the spring and early summer months when homeowners are preparing for the warmer weather. Scheduling construction during the off-peak season, such as fall or winter, may result in cost savings and greater availability of contractors. 4. Consideration of Pool Use: In Florida, where warm temperatures are common year-round, the timing of pool construction may be more about personal preference and lifestyle than weather considerations. Homeowners may prioritize having the pool ready for specific events or seasons, such as holidays or the arrival of guests. 5. Permits and Regulations: Florida has specific regulations and permitting requirements for pool construction to ensure safety and compliance with local codes. It's essential to factor in the time needed to obtain permits and approvals from local authorities when planning the construction timeline. 6. Landscaping and Maintenance: When building a pool in Florida, consider landscaping options and maintenance requirements tailored to the region's climate. Choose plants and materials that can withstand the heat and humidity, and plan for regular maintenance to keep the pool area in top condition year-round. 7. Contractor Experience: Given the prevalence of pool construction in Florida, there's a wide range of experienced contractors available to choose from. Take the time to research and select a reputable contractor with a proven track record of quality workmanship and customer satisfaction. 8. Enjoyment Year-Round: One of the significant advantages of building a pool in Florida is the ability to enjoy it year-round. Whether it's cooling off during the hot summer months or relaxing in the mild winter weather, a pool in Florida can provide endless enjoyment for homeowners and their families. In summary, building a pool in Florida offers the advantage of a warm climate conducive to year-round construction and enjoyment. By considering factors such as hurricane season, off-peak construction, permitting requirements, and contractor availability, homeowners can plan and execute a successful pool project that enhances their outdoor living space and lifestyle.
17 Feb, 2024
How do I take care of my Hot Tub? Below are some very important Hot Tub maintenance reminders, tips, and tricks. This is your friendly reminder of the importance of keeping your hot tub clean, balanced, and working properly. Caring for your hot tub can be an easy task, especially when you follow the five secrets to healthy hot tubs below. These tricks will help extend the life of your hot tub and maintain clean and healthy water to enjoy a warm soak. Maintaining good water circulation through the filter: Similar to a swimming pool, a hot tub’s cleanliness is dependent on water circulating through a clean filter with ease. We recommend cleaning the filters weekly or more if you use the hot tub regularly. The spa filter is typically located under the skimmer and hot tubs may have from 1 to 5 filter elements. Remove the filter elements and rinse them out thoroughly, getting deep into the pleats. Skin cells and body oils are usually white and do not show up as "dirty" on a filter element. Inspect the filters regularly to determine when it is time to replace them. Buy new filters annually, or more if the cloth appears loose, if the bands that hold the pleats together are broken, if it is taking longer to get it clean, if the heater does not heat as well as it used to, or if the water stays cloudy. If your hot tub isn’t heating like it used to, try cleaning the filters, or running the hot tub without any filters in it at all. If it heats up, it is time for new filters. Balance your water chemistry: The secret to keeping hot water in balance is to test the water regularly. Test your water 2 to 4 times per week depending on how often you use the hot tub and balance the pH, alkalinity, calcium hardness, and sanitizer levels every time. We recommend doing this twice a week, plus each time you get out of the hot tub. Keep a bromine floater in the hot tub, and use a capful of shock oxidizer each time you are done using the hot tub. Use pH Up and pH Down to keep your pH and alkalinity in line to prevent scaling on the spa and itchy skin. Dump and refill quarterly: A hot tub is a very small body of water, especially as compared to the human bodies we put in it. In addition to weekly chemical adjustments and filter cleanings, it is recommended that you drain and refill with fresh water every 3 months. Shower before use: Skin cells, sweaty bodies, body oils, shampoos, deodorants, perfumes, oh my! All of these get in the way of keeping a hot tub clean and healthy. Foam and cloudy water are good indicators of too much yuck being introduced into your spa. Stick to a simple yet routine cleaning schedule: Create yourself a routine to handle the above maintenance items. Balance chems, wash out the filter, remove debris, dump & refill the water, and don’t forget to clean the cover too! Would you like help maintaining your hot tub? We are here for you!
Pool Safety During Hurricane Season
17 Feb, 2024
The weather people tell us that we are in the midst of hurricane season from June to November. There are a lot of myths surrounding what to do with your pool during tropical weather. We hope the below information will help to clarify this. Below are 6 recommendations from the Florida Swimming Pool Association of what to do and what not to do when preparing your swimming pool for a hurricane or tropical storm. 1. DO NOT empty your pool. Keeping water in your pool provides the necessary weight to hold your pool in the ground as the water table levels around the pool rise and lower from the storm. Empty pools are at risk for pool shell popping. You do not want this to happen, pool popping makes for a very bad day. 2. IF a very big storm is threatening us and if you choose to lower your pool water level a bit, most properties in Gainesville should follow Option A: A) Lower the water level only an inch or two. Be sure that the water level is still a few inches above the bottom of the skimmer opening so as not to starve your pool pump for air. This option will be appropriate for most pools in our area. Or, B) Only if you are in a really high flooding area (defined as if your property has a big problem with standing water after a typical afternoon rain), you may choose to lower your pool by up to 1.5 feet of water (do NOT lower it any more than 1.5 feet of water). Be sure to turn your skimmer valve off so as to circulate the water through your main drain. This option is not necessary for most pools in our area. 3. Remove all pool toys and patio furniture from your pool deck and secure them safely in your garage or lanai. Please DO NOT throw them into the pool, as this may severely and permanently damage your pool surface. 4. On the day that the storm hits, turn your pool equipment off at the main breaker for that day only. Turn it back on right after the storm has passed. Do NOT leave the pool equipment off for more than the day the storm is actually passing through. You want the pool to be circulating and filtering again as soon as the danger has passed. 5. Remove all large fallen debris from the pool and skimmer baskets as soon as the storm has passed and it is safe to do so, as this will reduce the chance of debris clogging up your skimmer or main drain plumbing lines. 6. Add chlorine or shock to your pool immediately before and after the storm. And of course, safety comes first during a storm. Don’t risk your safety to do one of the above recommendations. Preparation is the key during hurricane season! After the storm passes, if you need a clean up, let us know. We would be happy to help!
07 Feb, 2024
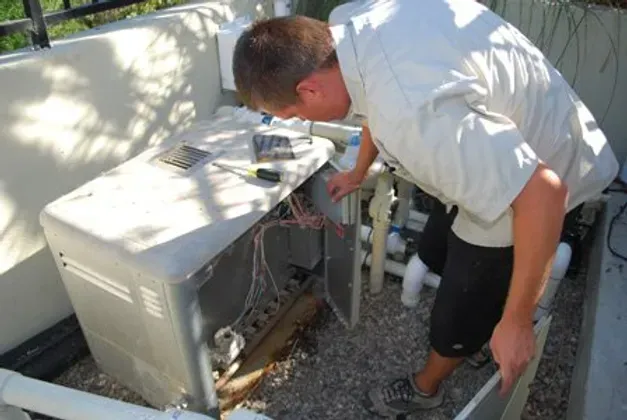
Pool heaters are a fantastic way to be able to enjoy your pool for a few bonus months in the late fall and early spring. To get the most out of your backyard investment, we recommend that you inspect and fire up your heater several times throughout the year. Below are some heater maintenance tips for you to follow: Clear all debris from the top and around the heater. Over time, debris and dirt can accumulate on the heater, reducing its efficiency. To clean the heater, turn off the power to the heater and use a garden hose with a nozzle to spray the external coil of the heater, from top to bottom. Make sure to clean the coil properly without damaging it. Check the surrounding plumbing for cracks or water leaks. Maintain good airflow around the heater. Debris such as leaves, pine needles and other outdoor elements can clog up the pool heaters internal components, reducing its efficiency. Regularly check and clean the heater's filter to ensure it's free from debris. Additionally, ensure there are no rodents nesting inside or chewing on wires Make certain the heater is sitting level and away from lawn sprinklers Clear out roof gutters to prevent rain runoff from coming down on the heater Install roof gutters above your pool equipment if you do not already have Fire up the heater, adjust the temperature, and let it run for an hour every month Keep critters away from nesting inside the heater (use moth balls and other insect deterrents) Keep your pool water chemistry in balance to prevent acidic or alkaline water from running through your heater The single most often cause of heater problems is low water flow. Here are some steps to check the water flow: Check the pool skimmer and pump basket for debris. Clean the filter if it is dirty. 9 OUT OF10 TIMES THIS IS THE PROBLEM! Call us and we can give your filter a deep cleaning or you may need to replace your filter element: 352.373.0612 Check the water level in the pool. If it is too low, the pump may not be able to pull enough water through the heater. If your heater has an error code such as the following, call us and we will dispatch a technician for the repair. Let the office know the code you are experiencing. E05 High Limit Switch E06 Open Pressure Switch E07 Low Gas Pressure E08 Ignition Failure E09 Flame Failure Other issues that can cause heater issues are electrical or gas supply in which case you definitely want a professional. However, if propane is your fuel source, make sure the tank isn't empty! At Florida Leisure Pool & Spa, our technicians are trained experts to diagnose and service your heater. Call us at 352.373.0612 or email us at: service@floridapoolspa.com and let us help you.
Cartridge Replacement on a pool
07 Feb, 2024
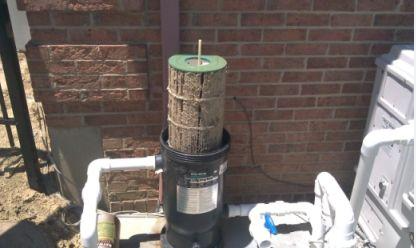
A big part of maintaining healthy pool water is a clean filter cartridge element. It is important to keep an eye on your pool filter element when cleaning your pool (also called a filter cartridge). Filters are an essential component of your pool circulation system and are integral to keeping your pool clean, clear, and healthy to swim in. Theoretically, pool filter elements can run for about 2,000 hours and should be replaced every 1-2 years. However, a filter element will not last as long when exposed to a lot of sunscreen, body oils, green dirty pool water, and other contaminants in your pool water. A filter element will also deteriorate more quickly if not kept clean regularly. Observe the condition of your filter element on a weekly basis. Clean it every few weeks year round for optimum performance. If the cloth appears loose, if the bands that hold the pleats together are broken, if it is taking longer to get it clean, or if psi doesn't go back down after cleaning, you may be ready for a new filter element. How do I know if my pool filter needs cleaning? The best way to determine if you need to clean your pool cartridge filter is by checking the pressure on the gauge. A number between 8 and 10 PSI over what a brand new filter would show means it's time to clean it. How do I clean my filter cartridges: TURN OFF ALL POWER TO THE POOL EQUIPMENT FIRST! Your equipment came with instructions to do this from the manufacturer, but in short: After turning off the power to the equipment pad, you'll need to bleed the pressure from the canister. That is the valve at the top of filter. It will spray out water relieving the internal pressure. Once the pressure is relieved, follow manufacturers instructions to remove the top of the filter canister. For more information, this is a link to video on cleaning a Pentair Clean & Clear Filter . You can also download the PDF manual HERE . Florida Leisure Pool & Spa has a full service maintenance and service division for that can take care of all your pool equipment. Reach out to 352.373.0612 or email us at: service@floridapoolspa.com Note that we offer weekly, monthly and customized service plans to meet your needs.
By Nancy Hine 07 Feb, 2024
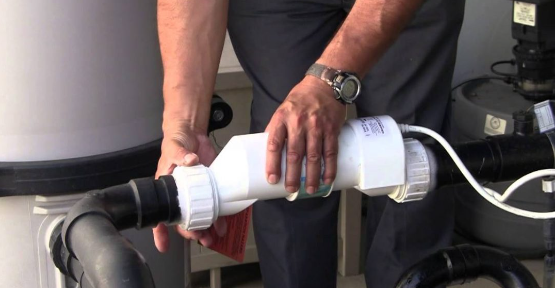
Your salt chlorinator cell should be inspected and cleaned every 3 months. Scale buildup on the internal plates of a salt cell is common and expected as a part of the salt system’s chlorine generation. However this scale buildup can interfere with chlorine production if not cleaned regularly. Keeping your salt cell free of scale is an integral part of keeping your pool clean, clear, and healthy to swim. Ideally, pool salt cells can run for up to 10,000 hours, which translates into approximately 4-5 years of normal residential use. After that, the salt cell reaches the end of its life and will be ready for replacement. Inspecting and cleaning your salt cell several times a year, as well as keeping your pool clean and balanced and keeping your pump runtime and salt cell output at efficient levels, will help to get the most life out of your salt chlorinator as possible. If you have any questions about how to best care for your salt cell or any of your pool equipment, don't hesitate to give us a call. We are happy to help you with your pool in any way. You can reach us at the office at (352) 373-0612 or anytime at service@FloridaPoolSpa.com
More Posts
Share by: